In the vast realm of digital streaming, Kodi has emerged as a powerhouse for those seeking a customizable and feature-rich media experience. One of the gems within the Kodi ecosystem is Channel Pear, a versatile platform that allows users to stream live TV channels and access a myriad of content. In this article, we’ll embark on a journey to explore the wonders of Channel Pear and guide you through the step-by-step process of installing it on Kodi.
Understanding Channel Pear
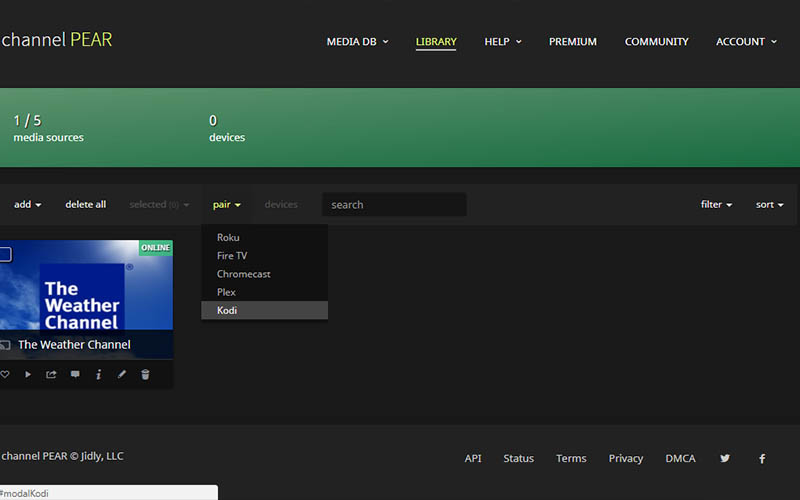
Channel Pear is not just another streaming service; it’s a gateway to a world of live TV channels and on-demand content. What sets Channel Pear apart is its user-friendly interface and a vast library of channels covering news, sports, entertainment, and more. By integrating Channel Pear into your Kodi setup, you can elevate your streaming experience and gain access to a diverse range of content from around the globe.
The Kodi Advantage
Before we delve into the installation process, let’s take a moment to appreciate the beauty of Kodi. Kodi is an open-source media player that serves as a hub for digital entertainment. With its robust architecture and support for third-party add-ons, Kodi allows users to customize their media experience according to their preferences.
Installing Channel Pear on Kodi not only expands the content library but also integrates seamlessly with the Kodi interface. This means you can enjoy the benefits of Channel Pear without sacrificing the familiar and user-friendly Kodi environment.
Step-by-Step Installation Guide
Now, let’s dive into the step-by-step process of installing Channel Pear on Kodi. Follow these instructions carefully to unlock a world of streaming possibilities.
Prepare Your Kodi System
Before installing any third-party add-ons, it’s essential to make sure that your Kodi system is ready. Ensure that your device allows installations from unknown sources. Here’s how you can do it:
- Open Kodi and navigate to “Settings.”
- Click on “System” or “System Settings” depending on your Kodi version.
- Select “Add-ons” from the left sidebar.
- Toggle the switch next to “Unknown sources” to enable installations from unknown sources.
Add Channel Pear Source to Kodi
Now that your system is ready, it’s time to add the Channel Pear source to Kodi. Follow these steps:
- From the Kodi main menu, go to “Settings.”
- Select “File Manager.”
- Click on “Add Source.”
- A window will appear. Click on the box that says “None.”
- Enter the following URL for Channel Pear: [Insert Channel Pear Repository URL]
- Name the source, for example, “Channel Pear,” and click “OK.”
Install Channel Pear Repository
With the source added, it’s time to install the Channel Pear repository. Here’s what you need to do:
- Go back to the Kodi main menu.
- Select “Add-ons.”
- Click on the box icon in the top-left corner (Package Installer).
- Choose “Install from zip file.”
- Find and select the source you added in Step 2 (e.g., “Channel Pear”).
- Install the repository zip file.
Install Channel Pear Add-on
Now that the repository is installed, it’s time to add the Channel Pear add-on to Kodi:
- Still in the “Add-ons” menu, click on “Install from repository.”
- Choose the Channel Pear repository.
- Navigate to “Video add-ons.”
- Find and select “Channel Pear.”
- Click on “Install.”
Authorize Channel Pear Account
After installing the Channel Pear add-on, you need to authorize your Channel Pear account. Follow these steps:
- Open the Channel Pear add-on.
- You’ll be prompted to visit the Channel Pear website to authorize your account.
- Visit [Insert Channel Pear Authorization URL] on a web browser.
- Log in with your Channel Pear account or create a new one.
- Follow the on-screen instructions to authorize Kodi.
Enjoy Channel Pear on Kodi
Congratulations! You’ve successfully installed Channel Pear on Kodi. Now, it’s time to explore the vast array of live TV channels and on-demand content that Channel Pear offers. Open the add-on from the Kodi main menu, browse through the channels, and start streaming your favorite content.
Conclusion
Channel Pear on Kodi opens the door to a world of streaming possibilities, providing access to live TV channels and diverse content. By following this step-by-step guide, you can seamlessly integrate Channel Pear into your Kodi setup and enhance your digital streaming experience. Enjoy the convenience of Kodi’s user-friendly interface combined with the rich content library of Channel Pear, and let the streaming adventure begin!