In the vast universe of online streaming, Kodi stands out as a versatile platform that caters to the diverse entertainment needs of users worldwide. If you’re a Kodi enthusiast looking to enhance your streaming experience, one name that often surfaces is “Zen.” This add-on has gained popularity for its extensive library and user-friendly interface. In this comprehensive guide, we will walk you through the process of installing Zen on Kodi, ensuring that you unlock a world of endless entertainment at your fingertips.
Understanding Zen
A Glimpse into the Streaming Paradise
Before delving into the installation process, let’s take a moment to understand what Zen brings to the table. Zen is a Kodi add-on that provides access to a vast array of movies, TV shows, and live TV channels. What sets it apart is its user-friendly interface and the ability to seamlessly integrate with your existing Kodi setup. Whether you’re into the latest blockbuster movies, binge-worthy TV series, or live sports events, Zen caters to a broad spectrum of preferences.
Preparing Your Kodi System
Before we embark on the installation journey, it’s essential to ensure that your Kodi system is ready to embrace the Zen add-on. Follow these preliminary steps:
Update Kodi
Ensure that you are using the latest version of Kodi to guarantee compatibility with Zen. You can check for updates and download the latest version from the official Kodi website (https://kodi.tv/download).
Enable Unknown Sources
To install third-party add-ons like Zen, you need to enable unknown sources in Kodi. Navigate to “Settings” > “System” > “Add-ons” and toggle the “Unknown sources” option to enable it. Acknowledge any warning messages that may appear.
Install the Kodil Repository
Zen is often found within the Kodil repository, so let’s set up Kodil first:
- Open Kodi and go to the “Settings” (gear icon) on the top left corner of the screen.
- Select “File Manager” and then click on “Add source.”
- A window will pop up. Click on the field that says “None” and enter the following URL for the Kodil repository:
http://www.lvtvv.com/repo/ - Below the URL field, name the media source. You can use a recognizable name like “Kodil” to make it easy to identify. Click “OK” to save.
- Return to the Kodi home screen and select “Add-ons” from the left-hand menu.
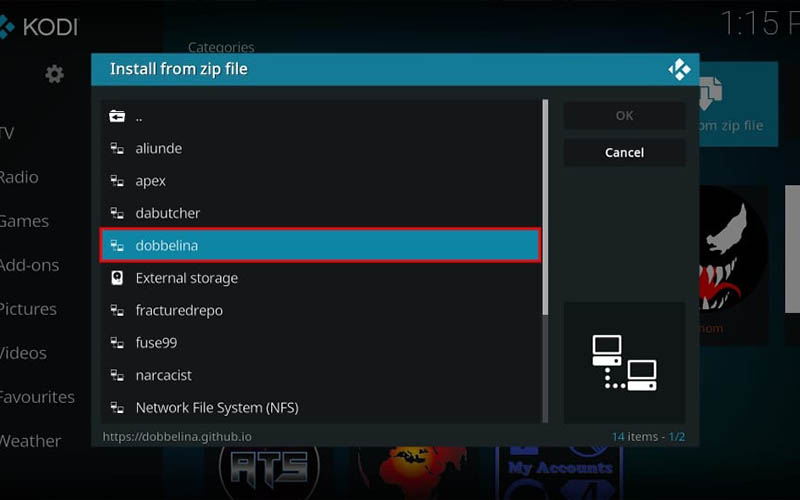
- Click on the open box icon (top left corner), then choose “Install from zip file.”
- Select the source you just added (“Kodil” or the name you provided).
- Install the repository zip file. It might be named something like
kodil.zip.
Install the Zen Add-on
With the Kodil repository in place, it’s time to bring Zen into the mix:
- In the same “Add-ons” menu, click on the open box icon again.
- This time, choose “Install from repository.”
- Find and select “Kodil Repository.”
- Navigate to “Video add-ons” and search for “Zen.”
- Click on “Zen” and then press the “Install” button.
- Wait for the installation to complete. You’ll see a notification when Zen is successfully installed.
Explore Zen and Enjoy the Streaming Pleasure
Now that Zen is part of your Kodi add-ons family, it’s time to explore its features and start enjoying a vast selection of content:
- Head back to the Kodi home screen.
- Navigate to “Add-ons” and select “Video add-ons.”
- Find and click on “Zen.”
- Explore the categories and options within Zen to discover movies, TV shows, and more.
- Enjoy seamless streaming with Zen’s user-friendly interface and extensive library.
Tips for an Optimal Zen Experience
- Keep Zen Updated: Regularly check for updates to the Zen add-on to ensure you have access to the latest features and content.
- Explore Zen Settings: Dive into Zen’s settings to customize your streaming experience. Adjust playback settings, enable or disable certain features, and tailor Zen to suit your preferences.
- Integrate Real-Debrid: For an enhanced streaming experience, consider integrating Real-Debrid with Zen. Real-Debrid provides access to premium sources, ensuring faster and more reliable streaming.
- Join Kodi Communities: Stay informed about the latest developments, troubleshooting tips, and add-on recommendations by joining Kodi communities. Platforms like forums and social media groups can be valuable resources.
Troubleshooting Common Issues
- Check for Updates: If you encounter issues with Zen, ensure both Kodi and the Zen add-on are up to date.
- Clear Cache: Within the Zen add-on settings, you can find options to clear cache. Doing so can resolve buffering issues and improve streaming performance.
- Reinstall Zen: If problems persist, consider uninstalling and reinstalling the Zen add-on. This often resolves common glitches.
- Community Support: If all else fails, seek assistance from the Kodi community. Forums and online groups are filled with experienced users who might provide solutions to specific issues.
In Conclusion
Elevate Your Streaming Experience with Zen
Installing Zen on Kodi opens the door to a world of limitless entertainment. The user-friendly interface, extensive library, and the ability to cater to diverse preferences make Zen a valuable addition to any Kodi setup. By following this comprehensive guide, you’ve now unlocked the potential for seamless streaming and cinematic enjoyment, all within the comfort of your Kodi environment. So, sit back, relax, and let Zen transform your viewing experience into a cinematic adventure worthy of the big screen.